Mango 5Star v2022.1
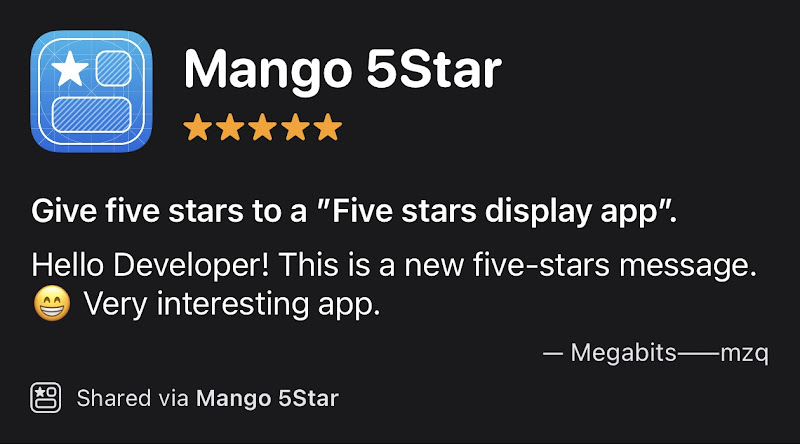
Image shared via Mango 5Star v2021.1
Mango 5Star v2022.1 is now available. What's new:
- DA 5Star is now Mango 5Star, a product under the Mango Umbrella.
- Support sharing reviews as an image.
Happy cheering yourself up with the 5-star reviews ^_^
iOS: How to Enable the Save Image Option in Share Sheet
When you want to present a share sheet to share an image, it isn't hard to figure out how to use UIActivityViewController. All you need is to prepare an UIImage or a URL pointing to an image:
let controller = UIActivityViewController(
    activityItems: [image], applicationActivities: nil)
present(controller, animated: true)
However, you won't see the "Save Image" option in the share sheet by default. The reason you don't see this option is unintuitive, but it actually requires the host app to have the permission writing to the photo library.
Since this action directly saves the image in user's photo library, you want to enable this convenient option. To do this, open your project's Info.plist file, add a "Privacy - Photo Library Additions Usage Description", and give it a value like "Support saving images to the photo library".
SwiftUI: How to Add an Inverted Mask
SwiftUI's mask(alignment:_:) method allows you to mask the view using the alpha channel of a given view. However, sometime you want to add an inverted mask. There are a few ways to achieve this depending on how your mask view is constructed.

Example of inverted mask effect.
Use eoFill
If your mask is a shape, you can create another shape by adding a Rectangle path and applying a FillStyle(eoFill: true):
struct CircleInRectangle: Shape {
    let padding: CGFloat
    func path(in rect: CGRect) -> Path {
        var shape = Rectangle().path(in: rect)
        let paddedRect = rect.insetBy(dx: padding, dy: padding)
        shape.addPath(Circle().path(in: paddedRect))
        return shape
    }
}

struct ContentView: View {
    var body: some View {
        Image(uiImage: #imageLiteral(resourceName: "img.jpeg"))
            .resizable()
            .scaledToFill()
            .clipped()
            .frame(width: 400, height: 225)
            .background(.white)
            .mask(
                CircleInRectangle(padding: 24)
                    .fill(style: .init(eoFill: true))
            )
        )
    }
}
Use .luminanceToAlpha()
SwiftUI's .luminanceToAlpha() modifier creates a mask by making dark colors transparent and bright colors opaque.
struct ContentView: View {
    var body: some View {
        Image(uiImage: #imageLiteral(resourceName: "pattern.jpeg"))
            .resizable()
            .scaledToFill()
            .clipped()
            .frame(width: 400, height: 225)
            .background(.white)
            .mask(
                Circle()
                    .padding()
                    .foregroundColor(.black)
                    .background(.white)
                    .compositingGroup()
                    .luminanceToAlpha()
            )
    }
}
Use .blendMode(.destinationOut)
SwiftUI's .blendMode(.destinationOut) modifier allows you to erase any of the background that is covered by opaque source pixels.
struct ContentView: View {
    var body: some View {
        Image(uiImage: #imageLiteral(resourceName: "pattern.jpeg"))
            .resizable()
            .scaledToFill()
            .clipped()
            .frame(width: 400, height: 225)
            .background(.white)
            .mask(
                Color.black
                    .overlay(
                        Circle()
                            .padding()
                            .blendMode(.destinationOut)
                    )
                    .compositingGroup()
            )
    }
}
Swift: The Direction of Date.distance(to:)
The official document of Date.distance(to:) says it:
Returns the distance from this date to another date, specified as a time interval.
But it has never been clear to me positive distance means whether the left side date is earlier or later.
So this tip is dedicated to myself: Date.distance(to:) is the opposite of minus. The distance positive when the left side date is earlier.
$ swift
  1> let now = Date()
now: Date = {}
  2> let oneHourLater = now.advanced(by: 3600)
oneHourLater: Date = {}
  3> let distance = now.distance(to: oneHourLater)
distance: TimeInterval = 3600
Finally scheduled my long overdue car service appointment, and just realized that I can carry my bike in my car, drop off my car, and bike back home.
Why hasn't this idea occurred to me before? What has US done to me?
I need to change.
DA 5Star v2021.3
DA 5Star v2021.3 for both iOS and macOS is now available:
- Added a button in Diagnostics to refresh app icons / podcast artwork images.
- It now clears the local artwork images when an app is deleted.
Happy cheering yourself up with the 5-star reviews ^_^
DA 5Star for macOS Is Now Powered by Catalyst
Here is what’s new in the latest DA 5Star macOS version updates:
- The macOS version is now powered by Catalyst.
- Added Big Sur widgets support.
- Added iCloud sync to the macOS version.
Happy cheering yourself up with the 5-star reviews ^_^
What's New in dA 5Star v2020.4
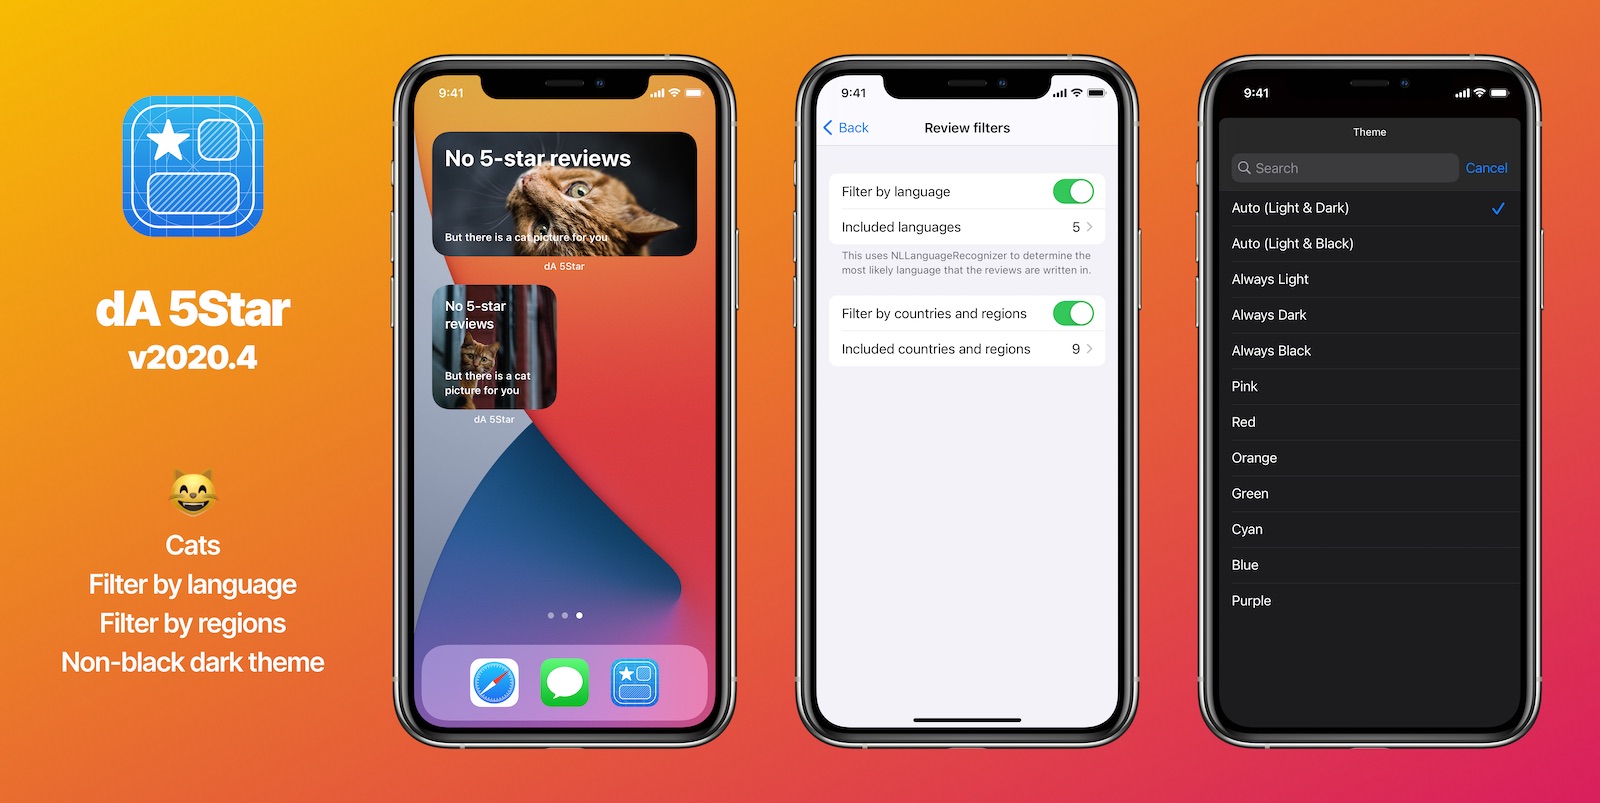
dA 5Star v2020.4
DA 5Star v2020.4 is now available. What's new:
- Added the ability to filter reviews by apps and podcasts in widget settings.
- Added smaller fonts options in widget settings. Also slightly improved the layout in the small widget.
- Fixed a bug where you can not add apps or podcasts not available in the US store.
- Improved iCloud sync after reviews are re-downloaded.
Happy cheering yourself up with the 5-star reviews ^_^
What's New in dA 5Star v2020.3
Thank you all for the great feedbacks for DA 5Star. I just released v2020.3 including the following most requested features:
- Added the ability to filter reviews by apps and podcasts in widget settings.
- Added smaller fonts options in widget settings. Also slightly improved the layout in the small widget.
- Fixed a bug where you can not add apps or podcasts not available in the US store.
- Improved iCloud sync after reviews are re-downloaded.
I am also working hard to bring the rest of your feedbacks to you in the future releases. Stay tuned.
Happy cheering yourself up with the 5-star reviews ^_^
DA 5Star for iOS and iPadOS is Launched

DA 5Star is 33% off until 2020-10-21.
To celebrate the launch, DA 5Star is 33% off until 2020-10-21.
App Store link: https://apps.apple.com/app/da-5star/id1473088658. If you already purchased the macOS version, you can get the iOS and iPadOS version for free.
What is DA 5Star?
DA 5Star is an iOS and iPadOS 14 home screen widget app that displays a random 5-star review of your apps and podcasts, and refreshes after however long you choose. It also has a macOS version that displays 5-star reviews as wallpapers.
Features
- Widgets: This is the sole purpose of DA 5Star. It displays a random 5-star review of your apps and podcasts in the widget, and refreshes after however long you choose.
- Apps and podcasts: It supports 5-star reviews of apps and podcasts on Apple platforms.
- Custom themes: You can customize the widget themes so they fit on your home screen.
- Review list: You can view the list of 5-star reviews of your apps and podcasts.
- iCloud sync: Your added apps and podcasts are synced with iCloud (macOS version is not yet supported).
- Custom app icons: It provides 5 alternative app icons.
- Dark mode: Yes.
The story behind DA 5Star
On July 6, 2019, I was listening to EP 56: The happiest Customer of the Independence podcast. Curtis pitched this app idea:
A mac app, that will sit in your menu bar. You can feed it your iTunes connect information. And it will go to your ratings, pull random 5-star rating every however many hours. And have like kind that those motivational quote things, but have in your wallpaper.
After hearing it, I just couldn't stop thinking about it. As developers, we all experienced those 1-star ratings that ruin our day or week. We humans are bad at ignoring them. We fail to remind ourselves that there are more important 5-star customer ratings out there. So I immediately created the Xcode project and started implemented. On the next day I sent the hosts @eataduckimust, @parrots, @jellybeansoup a demo. I got great feedbacks and launched the first version in two weeks. I later then released 5 updates to improve it.
I didn't expect other huge updates to the app. Until one day after 2020's WWDC, I realized that this app is now viable after the introduction of iOS 14 home screen widgets. So the iOS version was born.
NOTE: The initial macOS version was a $1.99 (USD) paid upfront app. I decided to raise the price to $2.99 (USD) with the launch of the iOS and iPadOS version (it's a universal purchase). But I'm keeping the original price for another three days, so it's effectively a 33% off launch sale.
Again, you can purchase DA 5Star here: https://apps.apple.com/app/da-5star/id1473088658.